How to Enable TPM 2.0 in Windows 10 PC
Activate TPM 2.0 on Windows 10!
If you have been reading tech news regularly, you might know that Microsoft recently released the first build of its Windows 11 operating system. However, not everyone can use this build as it’s only available to those who have joined the Windows Insider Programme.
Although the Windows 11 upgrade is provided for free by Microsoft, your PC still needs to meet the minimum requirements. If your PC doesn’t meet the minimum requirements to run Windows 11, you won’t receive the stable build of the operating system.
TPM Requirement for Windows 11
The one thing that had left lots of people stuck while upgrading their existing operating system to Windows 11 is the requirement for TPM. Actually, Windows 11 needs a TPM 2.0 hardware chip during the installation. Without the TPM 2.0 chip, you can’t install the new operating system.
In case, if you don’t know about the TPM, you need to check out our guide Check if Your PC has TPM for Windows 11. We have discussed TPM on that guide and how to check if your PC has TPM 2.0.
Another thing that users should note that most modern PCs now come with a TPM chip. That means that your device may include a TPM chip, but there’s a possibility that it isn’t enabled by default. So, if TPM is not enabled on your System, the PC health check tool will say, ‘This PC can’t run Windows 11’.
Steps to Enable TPM 2.0 in Windows 10 PC
So, before you make your mind to skip Windows 11 or purchase a new computer just to run Windows 11, you need to check whether your device has a TPM chip or not. In this article, we will share a step-by-step guide on how to Enable TPM 2.0 on Windows 10 computers. Let’s check out.
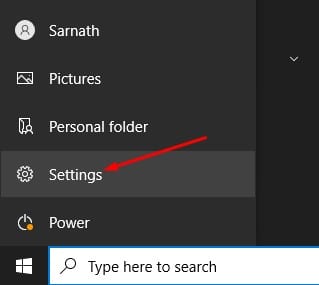
Step 1. First of all, click on the Windows 10 start button and click on the ‘Settings’.
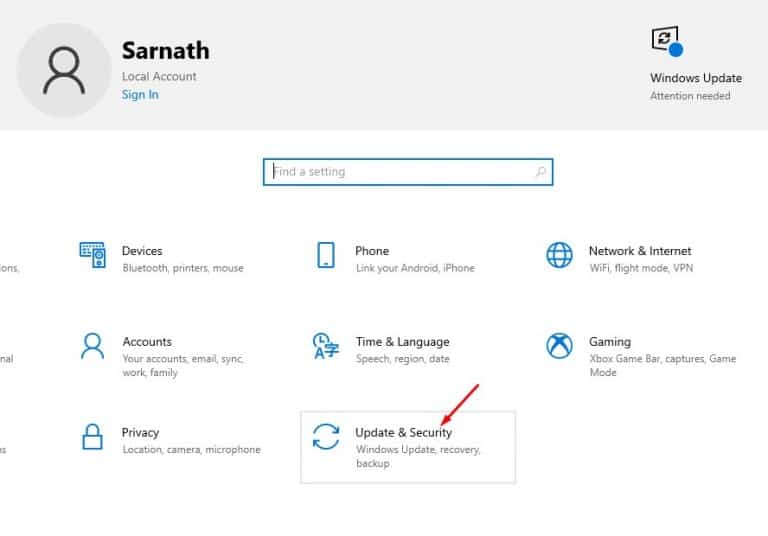
Step 2. On the Settings page, click on the ‘Update & Security’ option.
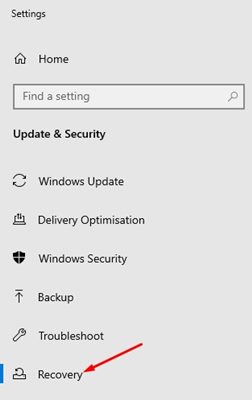
Step 3. On the left pane, click on the ‘Recovery‘ tab as shown below.
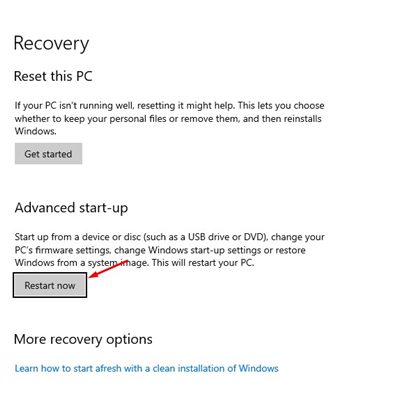
Step 4. On the right pane, click on the ‘Restart Now’ button behind the Advanced Startup.
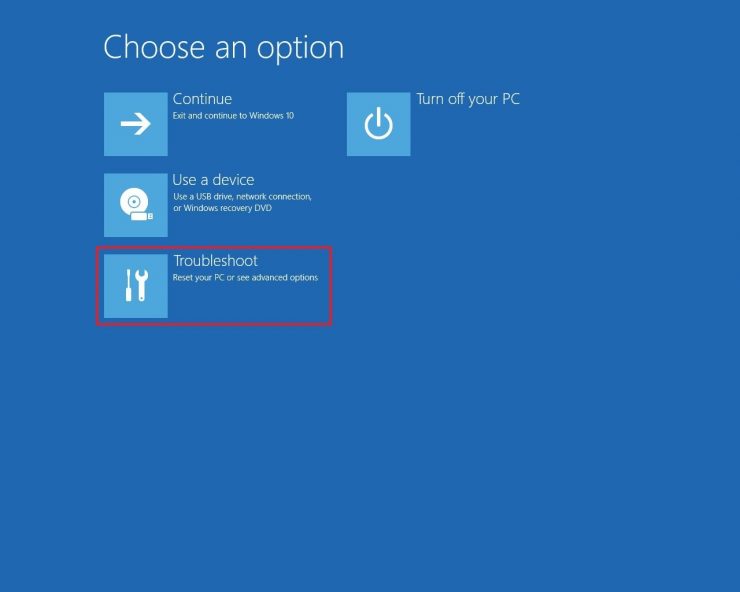
Step 5. This will reboot your PC and will launch the Advanced Startup option. Next, click on the ‘Troubleshoot’ option.
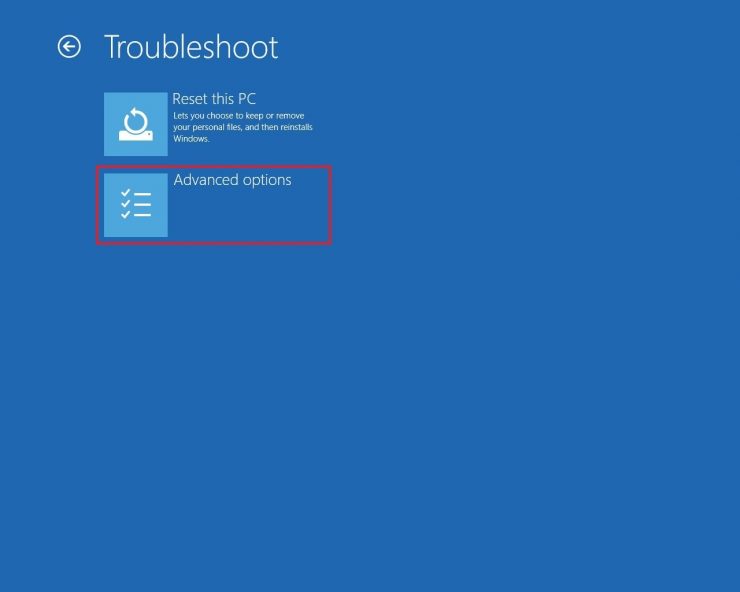
Step 6. On the next screen, click on the ‘Advanced Option’
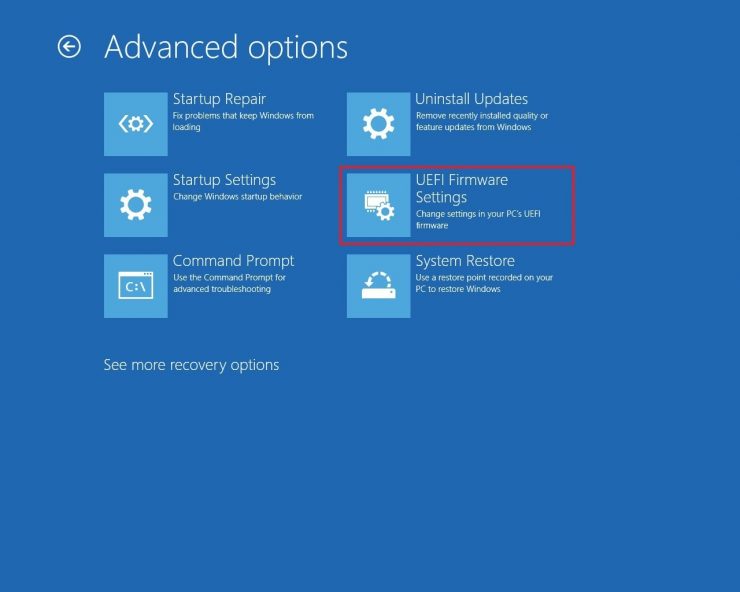
Step 6. On the next page, click on the ‘UEFI Firmware Settings’ option.
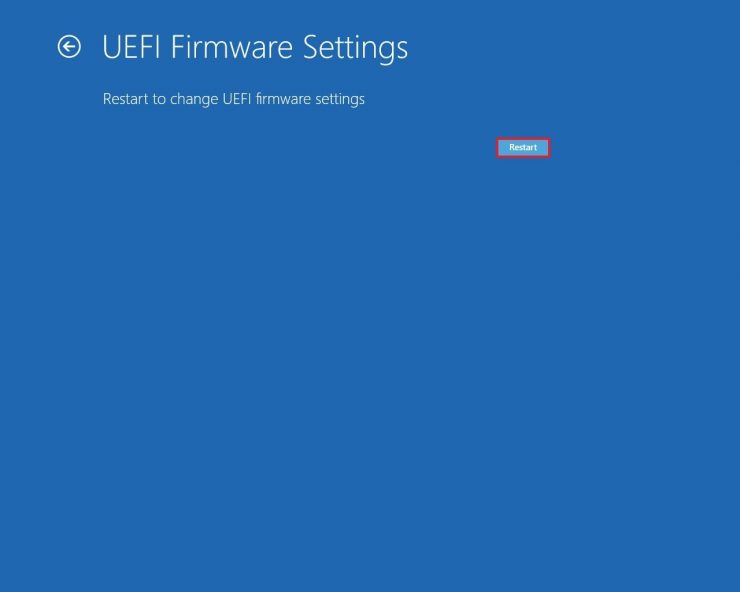
Step 7. Next, click on the ‘Restart‘ button as shown below.
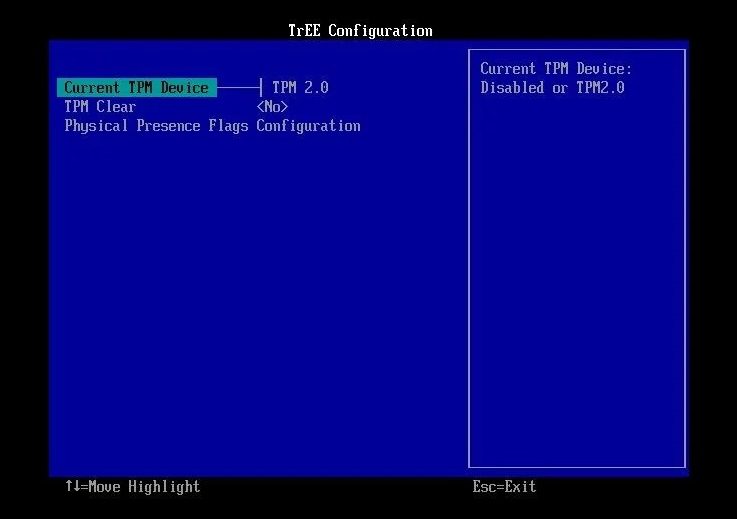
Step 8. Now on the Boot Maintenance Manager, select the ‘TPM Configuration’ option.
Step 9. On the next page, select ‘TPM 2.0’ on the Current TPM device. Next, select the ‘Enabled’ option and press the Enter button.
Important: The TPM settings might vary according to the UEFI or BIOS. You can even go to UEFI mode when you boot your PC by pressing some dedicated keys. For example, I have to press the F2 button to access the UEFI/BIOS in ASUS Motherboard. Similarly, you have to press the ESC or F10 button to access UEFI mode in the HP computer.
That’s it! You are done. This is how you can enable TPM 2.0 in Windows 10 computers.
Σχόλια
Δημοσίευση σχολίου